
Getting Started in Portal Knights
When I first received Portal Knights from my son, I thought, here is another crazy kids game I might be able to play with my grandsons. Little did I know that I would be sucked into this game to the point of losing track of time. Spending about a month now in the adventure, I absolutely love it. I acquired the PC version of the game on Steam. You can play Portal Knights on PlayStation 4, Nintendo Switch, Android, Xbox One, iOS, or Microsoft Windows. It is considered a cooperative 3D sandbox action-RPG. The only downside is that it is only a 4-player game and not cross-platform, but it is still fun to gather in groups of four on one platform.
To keep this review short and sweet, I only chose the four best things I like about Portal Knights. They are: the easy tutorial, adventuring to different islands with all the crazy bosses, fun with crafting and building your own supplies, and rebuilding your island the way you want it.
To start the game, you will be asked to create a character. Creating your character entails choosing your class, looks, and name. It wasn’t obvious how to choose your name until I clicked the box where it has your class with a number (e.g. Ranger123). In that square, type the name you want. Once you accept your name, gameplay starts.
On the start page there are multiple choices to consider: You can create an adventure or a creative build and decide your host settings. Adventure mode includes questing, farming, building and fighting foes. If you take the creative mode you can farm, build and create the islands as you want them. Click either Adventure or Creative to start your universe and don’t forget to name it! In the beginning, I took the adventure mode and made my own personal island. At the bottom of this page, there are Host Settings. You can pick Private, Online friends only, Wi-fi/Lan only or Public. If you are playing with friends, you can travel as a Group or Individually to different islands in your universe. A permissions button for your home Island lets you select whether or not to permit your friends to build & mine and open player chests. This button is important if you are building a public island. There is a choice to lock the player chests from Friends and/or Non-Friends that come to visit. Now that all the beginning specifics are determined, the craziness and fun begins.
Four Things I Enjoy in Portal Knights
Easy Tutorial
If you enable the tutorial, you will see the beginning cutscenes and all the information you need to survive in the world. The tutorial will take you through all your keystrokes so you know how to move about and look at what you need. To double-check that the tutorial is on, press the ESC key and go to the settings. Under ‘Gameplay’ turn on or off the tutorial.
When you start the game, your character will begin in Squire’s Knoll. On the left side of your screen you will see your current quests. If you have the tutorial selected, there will be a yellow light beam and a bullseye-type circle that will be a guide to your quests. I suggest taking all the quests you see to build your experience points (XP) up and collect all the shinies as you progress.
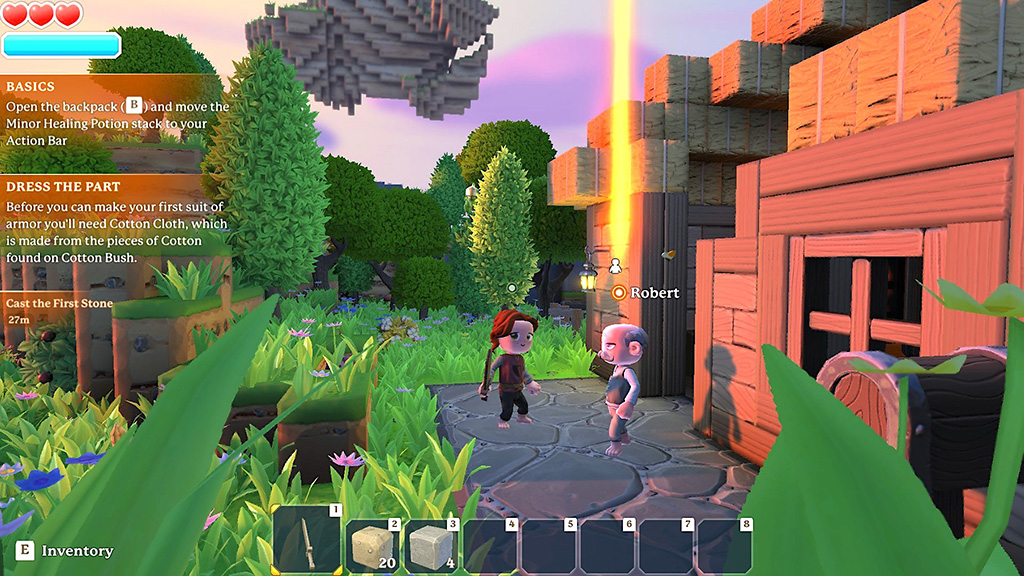
The controls are a bit different from what I am used to in my other games but they are very easy to acclimatize to. Interact with the NPCs by pressing F or right click. To fight, target with a right click and then whack things using left click on your mouse. You do have the option to change the default keybinds if it drives you to madness. To pick certain weapons or items on your bar use your 1-8 number keys. You will have to move them to your bar by opening your inventory (B) and dragging it where you want each weapon, potion or building material. Just follow through the tutorial until you get the hang of it and then, if you want, turn off the tutorial. Personally, I like to leave the tutorial on because it makes finding your next quest more visible.
Adventuring and Bosses
As you move through your quests, you will progress to different islands and fight different creatures. The first time through there will be a need to make some portal stones to get to the next island. The tutorial and quests will guide you through this.
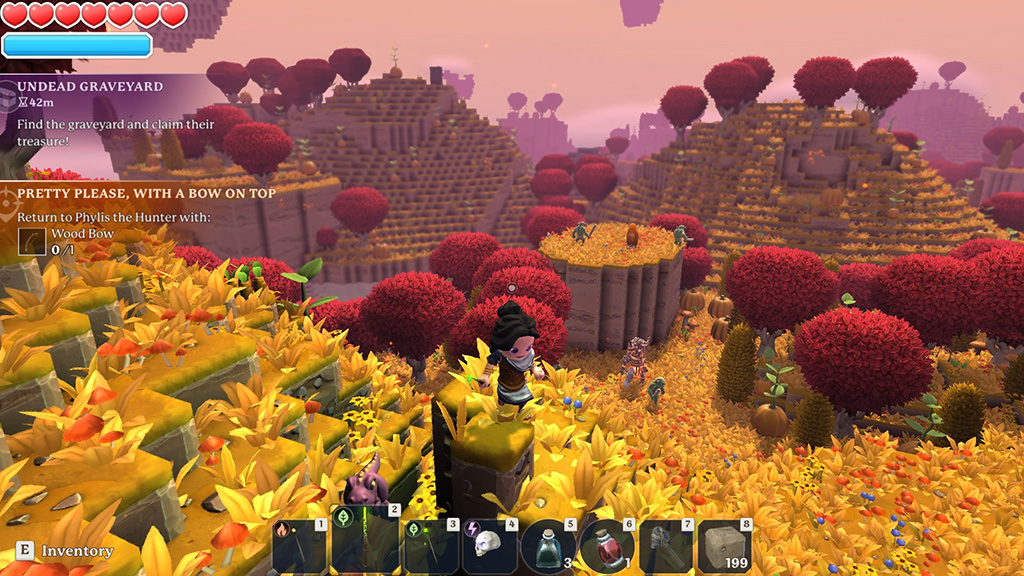
In your adventuring, press M for map and see the islands you have opened. Once you open the islands with the portal stones that you will make, traveling directly to the map will be available. Looking on the map, there is a button with a house in the left-hand bottom corner. Click that button to go back to your home base. Next to the home button, there is another button with a platform picture that is used to travel to your current island’s landing pad. To go to one of the other islands, click on its name and you will open a page that gives you a few more choices: Set as Home or Travel. It will also inform you what things you will find there including creatures, plants, ore and NPCs you have talked to. On the picture below you will see a chest with purple wording, in this case, Undead Graveyard and 42 minutes left. The game has events and they will flash on your map and alert you to them, tell you where to go, and how many minutes you have to complete the event. For the Undead Graveyard, it took my friend Gill and I working and fighting together to complete this event.
I would like to make a note here. If you travel and adventure with friends, the quests on that island can be done by one of the team, and all receive xp credit. To share the shinies in the chest at the end of the boss fights, you need to be together by the chest before opening it.
I just touched the surface of your adventures to come, so go slow and fight, mine, gather and bring your friends!
Crafting and Building Your Own Supplies
Crafting is a large part of how you advance in the game. You will need to make armor, weapons and potions for your survivability in the larger XP islands. The tutorial will start you off with how you craft these items. For me, the lesson seemed so visual, that I had no issue learning how to craft. Some of the easy instructions are below with a picture to guide you.
Go to a workbench. On your top workbench bar (from left to right) the buttons are described as follows: Attributes and Talents, Armor, Inventory, Workbench, Map, and Quests.
If you see a letter in the top right hand corner of the button, that is your quick key to that section. For example: On the Attributes and Talent button there is a letter “C”. If you press “C” you will open the Attributes and Talents page.
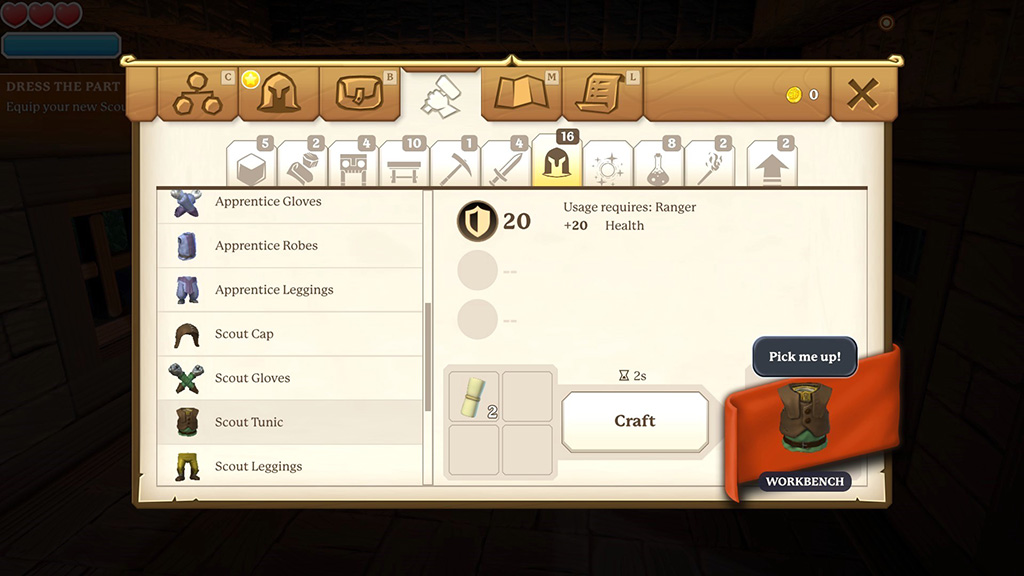
On the first few quests with the NPC, Robert, there will be a few quests to get you started. These are to break down the old wood in his house, upgrade the workbench, to build some wood blocks; and finish the walls on his house. As you progress, there will be lessons on how to build your first round of armor and how to pick your attributes and talents. When you need to do something, a yellow star will flash in the top left corner of the button on the page pointing you to the next step. In this case, the picture shows the star on the armor button. When you craft something don’t forget to pick up your items off the workbench or a flashing exclamation point will remind you. This brings us to all the items you will see under the crafting button!
Going left to right on the next set of buttons you will find: blocks, ingredients, portal stones, workbench, tools, weapons, armor, skills, consumables, miscellaneous, and upgrades. You will be directed to the items you need to craft each piece.
I worked on my quests, fought critters and bosses. At the same time I made a little pickaxe to mine stones, ore, trees and plants. Once your bag is full, you will need to know how to make some chests to store the extra pieces needed to craft. Go to your workbench and make a few chests, drafting table, furnace, anvil, altar, and alchemy table. The different workbenches will supply you with recipes to make potions, weapons, armor and everything you will need for fighting adventures on other islands in your universe or producing things for building your home.
Building Your Home
Building a home takes a lot of planning and supplies. Once you get enough wood to build your workbench, you can then see what elements are needed to make your wood blocks, flooring, doors, and windows. There are multiple types of blocks available to build your walls, stairs and floors. To top things off, you can create some awesome furniture too!
Building your own house and deciding where to put it is where the planning came in for me. I experimented with digging tunnels and linking islands in the sky with dirt blocks. All the dirt you dig turns into dirt blocks that you can place down to maneuver around and move up to high places when jumping up is not an option. The great thing to know is that you can always break down your errors and rebuild with the same blocks you break down. I also fill in the holes from mining with the dirt blocks, especially if there is a tunnel under the place I was mining ore. If you need more wood, find some trees to chop down, but be sure to plant more seeds. This way you will have an ongoing supply of wood to make more blocks. If you want a stone house, you can also mine for stone blocks or in some places there are marble floors, statues and other things you can break down and bring to your home. Be aware if you do that, those places you defaced will not regenerate what you took. The only way out of that is to totally regenerate the universe. It should not affect your Home Island or vacant islands you bought.
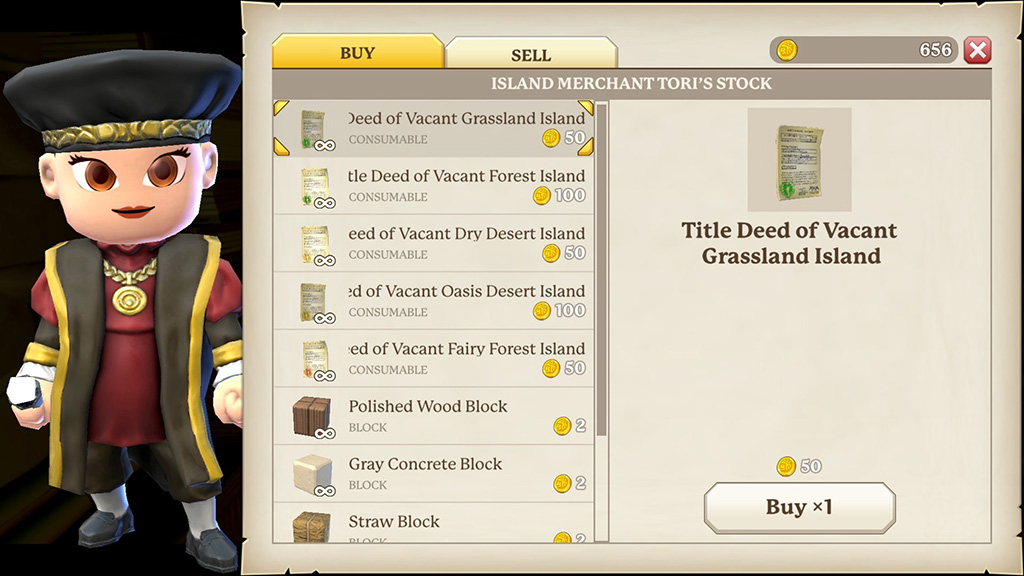
Vacant Islands? What vacant islands you ask? After playing around with buildings and practicing, a friend’s son told us you could buy an island at deed sellers! This was an exciting feature that intrigued both of us. I went to Fort Finch and talked to Island Merchant Tori. The deeds here were between 50 and 100 gold. I was told that the deeds are more gold as you progress to larger XP worlds.
My friend and I bought different islands for our personal home worlds and then decided which one to choose to place on our Gaiscioch Jr. Universe for our community that plays together. We decided the forest world suited the group and started working on our guild hall next to its landing pad. This island is free from fighting and is a community meeting place for our group. Of course, only 4 players at a time can be in the universe, but there is enough space for all to build and do what they love to do ingame. Whether it is building a home, store, garden or hanging out in guild hall, it’s exciting to find a game like Portal Knights and to be a part of the Gaiscioch community that makes things fun! The ideas are endless, so get your creative juices flowing and try Portal Knights out!
“It’s not the loot and accolades you walk away with, it’s the memories and friendships that you cherish forever.”
- Foghlada (Founder & Activities Director of the Gaiscioch Community)
I would love to hear what your favorite parts in Portal Knights are for you. Being new to the game, I would appreciate any comments or suggestions on the things not mentioned.
For more information about the Gaiscioch Community, please go to: https://www.gaiscioch.com/
For more information about Portal Knights, please go to: https://portalknights.com/en/
About the Author

GmaFog
Senior Editor
As GmaFog loves to adventure in life, she gets excited about everything surrounding her. In addition to working as a Web Production Assistant for Franchise Update Media, she voluntarily writes and edits for Gaiscioch Magazine. She attends Westside Christian Church and loves going on missions trips to Rwanda with Africa New Life Ministries. In her spare time, Gma plays games with The Gaiscioch [GSCH] Family and grandsons; dabbles in photography; and explores crafting ideas. You can always ask her questions, as she enjoys helping others, in-game and out.
About Portal Knights
The world of Elysia needs YOU! Join this cooperative, 3D sandbox action RPG to level up your character, craft epic weapons, conquer enemies in real-time, and build almost anything! Craft your adventure. Forge your hero. Become the ultimate Portal Knight!