
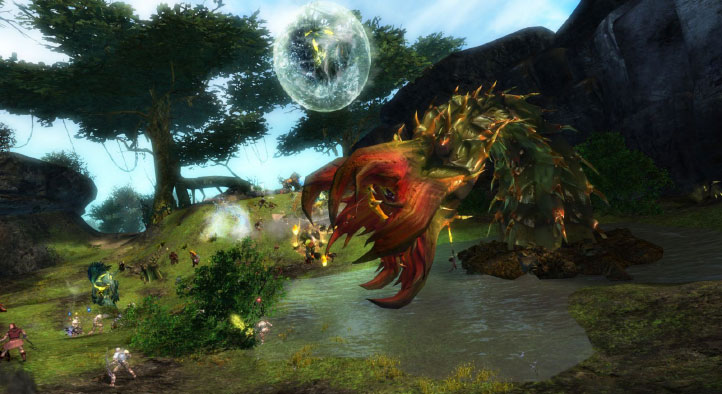
Triple Trouble - The Great Jungle Wurm
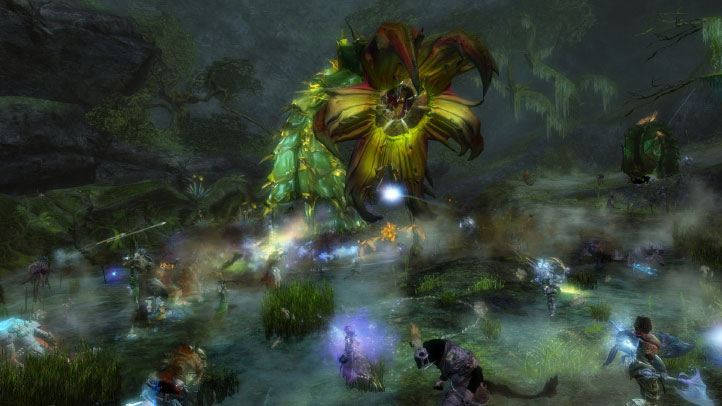
“The heroes of Tyria face a battle on two fronts; their beloved land is imperiled as never before. From under the sun-baked sands of Bloodtide Coast a gigantic, three-headed jungle wurm has arisen to threaten all who come within its domain due to Scarlett’s search for the magical leylines. In the mountains of Lornar's Pass, Scarlet's latest creation — a towering, mechanical monstrosity — is wreaking destruction.”
- Guild Wars 2 Living Story
Triple Trouble was released in conjunction with the Living Story: Origins of Madness and the Twisted Marionette. While Marionette is no longer available, the three headed wurm rampages through Bloodtide coast every 4 hours. The fight itself is essentially 3 boss fights going on simultaneously that are split into 3 Phases. The escort phase, decapitation phase and kill phase. All three wurms must be decapitated within 60 seconds of each other to progress from phase 2 to phase 3.
Waypoints Required:
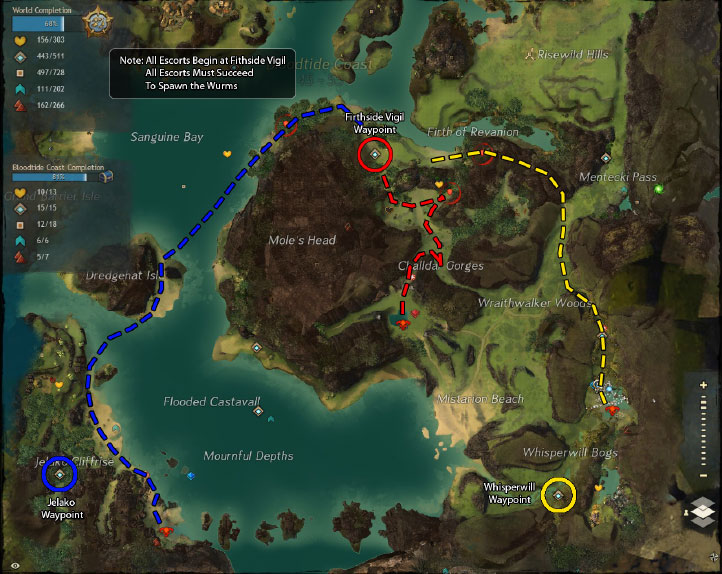
- Amber: Whisperwill Waypoint [&BLABAAA=]
- Crimson (Gather Point of the Event): Firthside Vigil Waypoint [&BKoBAAA=]
- Cobalt: Jelako Waypoint [&BK8BAAA=]
Food Buffs
- Phase 1 Food
- Main Zerg/Reflect Teams - Feast of Orrian Steak Frittes (+100 power, +70 vitality, +10 Experience from kills)
- Condi Teams - Rare Veggie Pizza (+40% condition duration, +70 condition damage, +10 Experience from kills)
- Phase 2 Food
- Everyone - Feast of Truffle Steak (+100 power, +70 precision, +10 Experience from kills)
Consumables Required:
Weapons: Sharpening stones or tuning crystals are required to max out everybody’s dps.
- Zerker Builds: Toxic Sharpening Stone (+100 Power, Condition Duration Increased By 10%, +10 Experience from kills)
- PVT Builds: Superior Sharpening Stone (Gain power equal to 6% of your toughness, Gain power equal to 4% of your vitality, +10 Experience from kills)
- Condi Build: Master Tuning Crystal (Gain condition damage equal to 6% of your toughness, Gain condition damage equal to 4% of your vitality, +10% Experience from kills)
Items:
- Fire Elemental Powder (Fireheart Rise)
- Deployable Mortar Kit (Fireheart Rise)
- Ogre Pet Whistle (Iron Marches)
Things to Note:
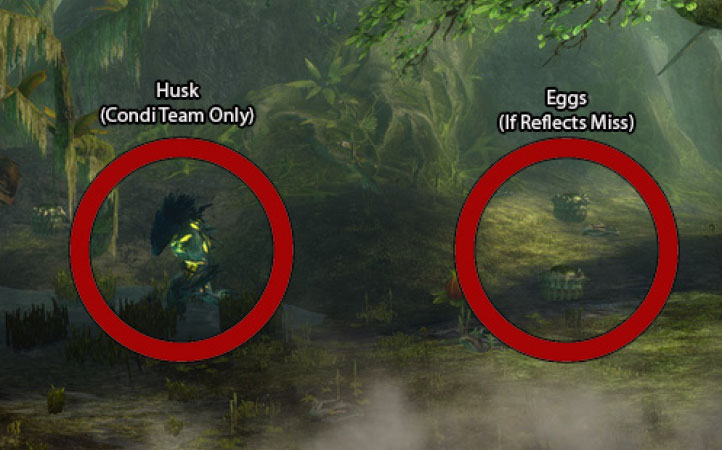
- Husks: Should only be touched by the Condi teams. They have extremely high armor and very low vitality
- Eggs: If eggs manage to get out they need to be dps’d down asap. If left alone eggs will turn into grubs and they have the potential to wreck the zerg
- Coordinated Kills: Voice comms while not necessary are strongly recommended to coordinate kills between phases and to ensure commanders can send/request help if needed or to communicate a need to extend the decap phase
- Blast Finishers & Fire Fields: It is important during burn phases that the zerg is doing max DPS and that everyone has 25 stacks of might. This is quickly achieved by using Fire Fields/Blast Finishers followed by Guardian Empowers (staff 4) & Warrior Banners
- Grouping: Unless in a designated Condi or Reflect team, players should never be grouped up. This is to allow boon sharing between those closest to you rather than just your party members. This is especially important during phase 2
Primary Set-Up
Since all 3 wurms need to be dropped at the same time it is important to make sure the dps is spread evenly between each wurm. The basic set-up is as follows:
- 3 Condition Teams (One 5 man team per wurm) - Their job is to deal with the husks. Necro’s, Engi’s, Thieves, and Ranger’s are most common
- 3 Reflect Teams (One 5 man team per wurm) - Their job is to reflect the eggs the wurm spits out, eliminating the need to kill eggs and grubs. Guardian’s, Mesmer’s, Ele’s, and Ranger’s are most common
- Class Split - The rest of the players are grouped by class then evenly divided amongst each wurm
Once set-up is complete, each wurm should have between 45-55 players in order to ensure a good chance of success
The Condition Teams
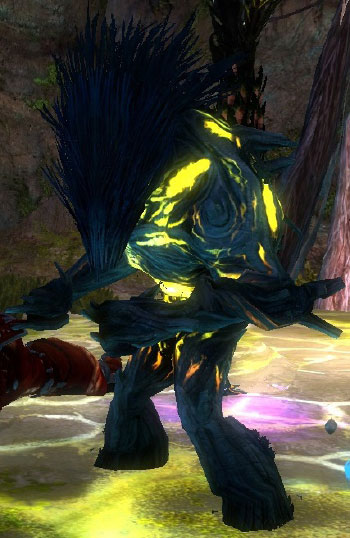 Condi teams are in charge of taking out any husks that spawn during phase 1. Teams are usually made up of Necromancers and Engineers with the goal of pulling husks away from the main zerg. Then a Necro’s Epidemic is used to spread condi to all the husks, essentially melting them. Husks have very high armor and low vitality meaning straight dps will do next to no damage to them while conditions will practically melt them.
Husk Attacks:
- Stomp - Knocks players into the air
- Punch - Knock back that launches players away from the husk
- Throw Parasite - Throws parasites at players causing them to vomit and leaving them with a 3 second stun. This will remove all kegs, eat me buffs, and phytotoxin clouds
Reflect Teams
Reflect teams are in charge of stopping the Wurm from spitting out eggs. Eggs that land and spawn will hatch into Veteran Wurm Grubs after 30 seconds. Grubs have ranged aoe’s, hit like a truck and are incredibly hard to kill.
The Reflect Team generally consists of a group of 5:
- Caller : The caller is normally the party lead. They will be watching for tells and calling when to drop reflects, large & small spins, as well as spits
- Primary Reflect: 2 people are assigned to primary reflect as the first option. They will be the first to drop reflects
- Secondary Reflect: 2 people assigned as backup in case reflects are dropped and the wurm spits husks instead of eggs
- Classes able to reflect (order of preference): Guardians, Elementalists, Mesmers, Rangers, Engineers, and Thieves
Anyone interested in learning to reflect or call is highly encouraged to watch this reflect strategy video by GW2 player Kalak. https://youtu.be/A88iwlpx_U8
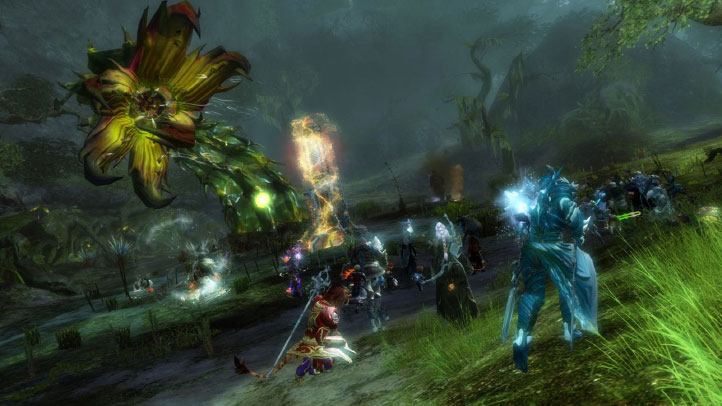
Phase 1 - Escort
At 5 minutes after the hour the final staging/pre-escort will begin. This is a 5 minute warning to players that the event is about to start. At 10 minutes after the hour the escort phases will begin.
[10] Escort Map
For each wurm an investigator will be making their way from the Vigil camp to each of the three spawn areas. Along the way they’ll encounter eggs and veteran wurm heads which need to be killed. Should the investigator die, the escort team will have 4 minutes to rez the investigator before the event fails. Note: All escorts must succeed for the Evolved Jungle Wurm to spawn.
Each Wurm will need a 5 man team to run the escort. Escorts scale, so any more than 5 players will make things more difficult. This also gives commanders an extra 5-10 minutes to finish instructing the zerg on how to successfully decapitate their wurm.
Phase 2 - Decap Phase
When Escorts arrive at their designated wurm, players will have about 1 minute to do any final prep work before the fight begins. Generally this will involve popping sharpening stones/tuning crystals, dropping food/banners, as well as assigning war banner numbers (usually done right after the commanders explanation).
Once the wurm arrives, players will have 14 minutes to take the wurm heads to 0 health and decapitate them. When the first head has been decapitated, the over-all timer will reset to 60 seconds and the other two heads must be decapitated during this window to proceed to phase 3.
The basics of each wurm is to:
- Perform the specific mechanic to activate burn (different depending on what wurm you are at)
- Burn wurm
- Repeat until wurm is about 5-10% hp (commanders will be coordinating a final burn, usually starting with Amber)
- Wait for commanders call to go, then dps wurm until the decapitation occurs
All wurms have the following basic attacks:
- Small Spin & Spit: The wurm will curl up and unleash a downpour of green ooze. There is a small aoe around the wurm when this happens and around half a dozen other aoe’s showing on the ground indicating where the spit will land. Ooze has a tendency to one-shot players so make sure you dodge out right away
- Large Spin: The wurm will curl and do a large AOE spin dealing damage and knocking people back. This attack will cause players to lose kegs at Cobalt, clouds at Crimson, and the “eat me” buff at Amber
- Husk/Eggs: The wurms pull back (just like a cobra ready to strike) then spit out 3 husks or eggs at predefined areas. The husks can’t be reflected. Husks share the same animation as eggs, so if husks appear the back-up reflectors will be called in. Husks have an internal cooldown of 100 seconds and eggs
Crimson Wurm
Crimson Wurm
Crimson is considered the easiest out of all the wurms mechanic wise. Around the wurm players will see 3 phytotoxin extractors (see mini-map for location): Red, Yellow, & Blue.
Extractors
Players will need to run in a counter-clockwise direction and pick up the various colored clouds that will randomly spawn and take those clouds to their corresponding colored extractor.
Clouds
Once the extractors are filled the burn phase will trigger. It takes 30 of each color to fill the extractors.
Tips & Tricks:
- You can carry more than 1 color at a time
- Speed is your friend, so if you have buffs to speed the group use them (road markers are excellent for this)
- Make sure everyone is running in the same direction, generally counterclockwise
- Skills such as Blink, Teleports, Portals will cause you to lose your clouds so do not use them
- When stacking for burn make sure you have the wurm set as a priority target and that you are stacked on the tag and getting double numbers
For the final burn of phase 2, Crimson will usually fill both yellow and blue extractors and then wait for the call to fill red.
Cobalt Wurm
Cobalt Wurm
Cobalt is arguably the most difficult of the three wurms as it requires quite a bit more coordination and the individual players carry a lot more responsibility on this wurm. There are three keg locations around the map: Easy spawn, Medium spawn, Hard spawn.
Keg Spawns
Kegs will spawn randomly at one of these three locations every other minute. The goal is to run 20 kegs from these locations and place them on the giant arrow in front of the wurm to trigger the burn phase.
[16] Kegs
Tips & Tricks:
- Make sure you do not pick up a keg until you are told to by the commander, stack and then run as a group
- If you lose your keg (falling in water, hit by spin/spit, or mobs) you will have a 20 second debuff where you can’t pick up another
- Do not use any skills like blink, portal or other transport skills as it will cause you to lose your keg
- Hard/Medium spawns are mini jump puzzles. So if you can, practice a bit before the wurm spawns
- When waiting at hard spawn, wait in the water in case the wurm spit lands on the platform
- It takes 20 kegs to trigger the burn phase and all kegs need to be dropped on the drop location (arrow)
While the overall concept seems simple, the execution of the mechanic can be difficult and a lot of issues can come into play when running kegs. Veteran Wurm Heads will spawn around the map, and if focusing on kegs/keg runners, they can rapidly reduce the number of kegs dropped on the drop spot. Husks, if they are in the keg drop area, can destroy kegs with their launch attack. Another thing to keep in mind is the hard/medium keg spawns can also be hard to run if players are not adept at doing jumping puzzles. Kegs can be lost by people falling into the water. Also, the Wurm’s aoe’s can cover the keg drop point and land on the zerg so players need to be on their toes and dodging as needed to avoid losing their kegs.
Amber Wurm
Amber Wurm
While the mechanic is fairly straight forward, the Amber Wurm is by and far the most unforgiving if mistakes are made. Players will need to seek out and destroy a special Abomination to get the required buff to be eaten.
Once it dies, it will explode, but instead of dealing damage the explosion will provide the Wurm Attractant, or more commonly referred to as the “eat me” buff to all players in the white AOE circle. The buff allows players to be eaten by the Amber wurm and enter it’s stomach where they will grab harpoons, bust their way out & trigger the burn phase. It’s very important that all players are listening to their commander and working as a solid unit. It takes 20 harpoon shots once players are spit out to trigger the burn phase.
Mechanic Breakdown:
- When directed to, players need to kill the abomination and get the “eat me” buff.
- Players then run to the red arrow in front of the Amber Wurm and stack. They will also need to drop stability and reflects if they have them to prevent husks & wurms from stripping them of the buff
- Make sure to set priority target on the Amber Wurm
- Once inside the wurm, players need to look for the skeleton and pick up the harpoon guns
- Turn 180 degrees and shoot at the valve to get the Wurm to regurgitate players
- Target the Amber Wurm and run close to it before firing your last harpoon shot. DO NOT SHOOT YOUR HARPOON IF YOU DO NOT HAVE A CLEAR SHOT
- It takes 20 shots to trigger the burn
- After the burn DO NOT attack the abomination. All players that were previously eaten will have a de-buff that lasts 30 seconds where they can’t be swallowed again
- There is no in between state for a burn phase. It will either be a success or a fail
Tips & Tricks
- Stability & reflect skills will help when stacking to get eaten by the wurm
- Make sure not to hit husks unless on the condi team. The husk parasites will remove your “eat me” buff
- Make sure Amber is set as your priority target
- Once you are spit out, cast stability and run to a place where you can get a clear shot on the wurm with your harpoon
- Do not prematurely kill the abomination, wait for your commander's call
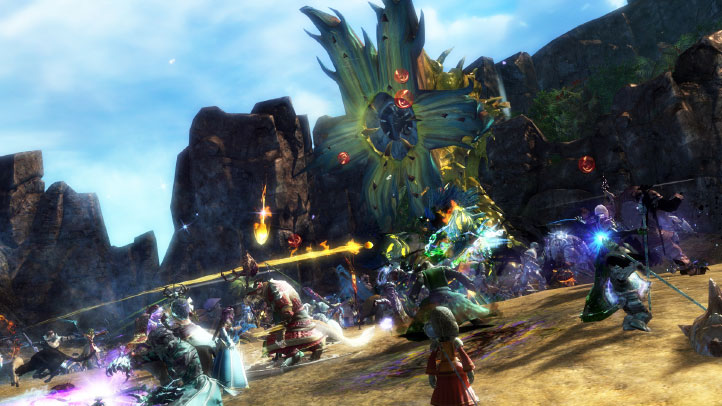
Phase 3 - Kill
[26] Decap
Once all 3 of the wurm’s heads are decapitated, phase 3 will begin. This is the hardest part of the fight and it requires the most player skill. Players will only have 2 minutes to DPS their wurm head down while trying to avoid the Wurm’s attacks and making sure they are stacking in the correct position, buffing, and dropping consumables. This part is a very frantic, fast paced, adrenaline filled fight.
During phase 3, the wurms have the following attacks:
- Flippity-flop: The wurm will flail around on the ground, much like a fish out of water. While the move looks intimidating it does no real damage. This is the best time to get in there and dps the wurm down
- Leap: The wurm will leap high into the air and slam down into the ground, doing damage and knocking everyone back. Aegis and dodges are crucial to avoiding the knockback and losing dps
- Charge: The wurm will randomly target someone, rear back and then perform a charge attack, launching itself forward. During the charge, the wurm will leave a poison trail behind it which applies conditions and deals massive damage to anyone caught in it. Players need to be ready to dodge to the side when this happens
Tips & Tricks:
- Always make sure that you position yourself between a wall and the wurm. The goal is to get the wurm cornered on a wall to maximize dps
- Never run directly behind the wurm head. After a charge attack the wurm will leave a trail of poison
- Dodge, Dodge, Dodge, & DODGE! Dodging is your key to survival! Your commander and fellow players will be calling out dodges and you need to react immediately, especially if you are on the wall. When the wurm does its charge attack against the wall, the attack is very similar to how a fiery greatsword rush functions and will almost always insta-down players
Break Down of Phase 3
- The commander will call for players to stack and drop food. Players need to eat it and then target the wurm head. Mortar kits and Turrets should be dropped at this time as well
- All players will then move in to dps the wurm head while making sure they always have their backs to a wall in order to get the wurm to charge there
- DPS like mad. Listen for when to dodge and drop banners. Watch for where to stack
- Once the wurm is on the wall, drop Time Warps, Fiery Greatswords, Ice-bows, Ogre Pet Whistles, and Fire Elementals
- The fight will go on until the wurm is dead
- If all wurms are successfully killed, players will see a giant red arrow directing them to a portal that will take them to their reward chest. Don’t forget to loot the wurm head before portaling
About the Author
Soren
Writer
Bacon lover. Gamer of games. Tamer of penguins. Lovable Saskie.
Always Remember: Never give up on your dreams, keep sleeping!
About Guild Wars 2
Guild Wars 2 is an online role-playing game with fast-paced action combat, a rich and detailed universe of stories, awe-inspiring landscapes to explore, two challenging player vs. player modes—and no subscription fees!